Construct a Greenhouse Utilizing Plastic Bottles
Refresh Your Classroom with a DIY Plastic Bottle Greenhouse!
Revive that old, boring classroom with a splash of greenery! No need for expensive equipment or fancy tools, make use of the materials you have at hand and create a miniature greenhouse at your very own desk!
Grow some vibrant, lush plants right in the comfort of your classroom with our eco-friendly DIY plastic bottle greenhouse project!
What the Hell is a Greenhouse, You Ask?
Sure, kiddo. A greenhouse is a magical building enclosed mostly by glass to create an ideal environment for growing plants. It's like a secret garden where green thumbs can nurture delicate sprouts in adverse conditions.
You might've heard the term "greenhouse effect" in relation to global warming. While that one may not sound so good, this greenhouse we're making will be a godsend!
Let's Get Crafty: Making Your Own Bottled Greenhouse
To construct your DIY bottle greenhouse, you'll require only a few simple materials you can find around the house or grab easily from the recycling bin:
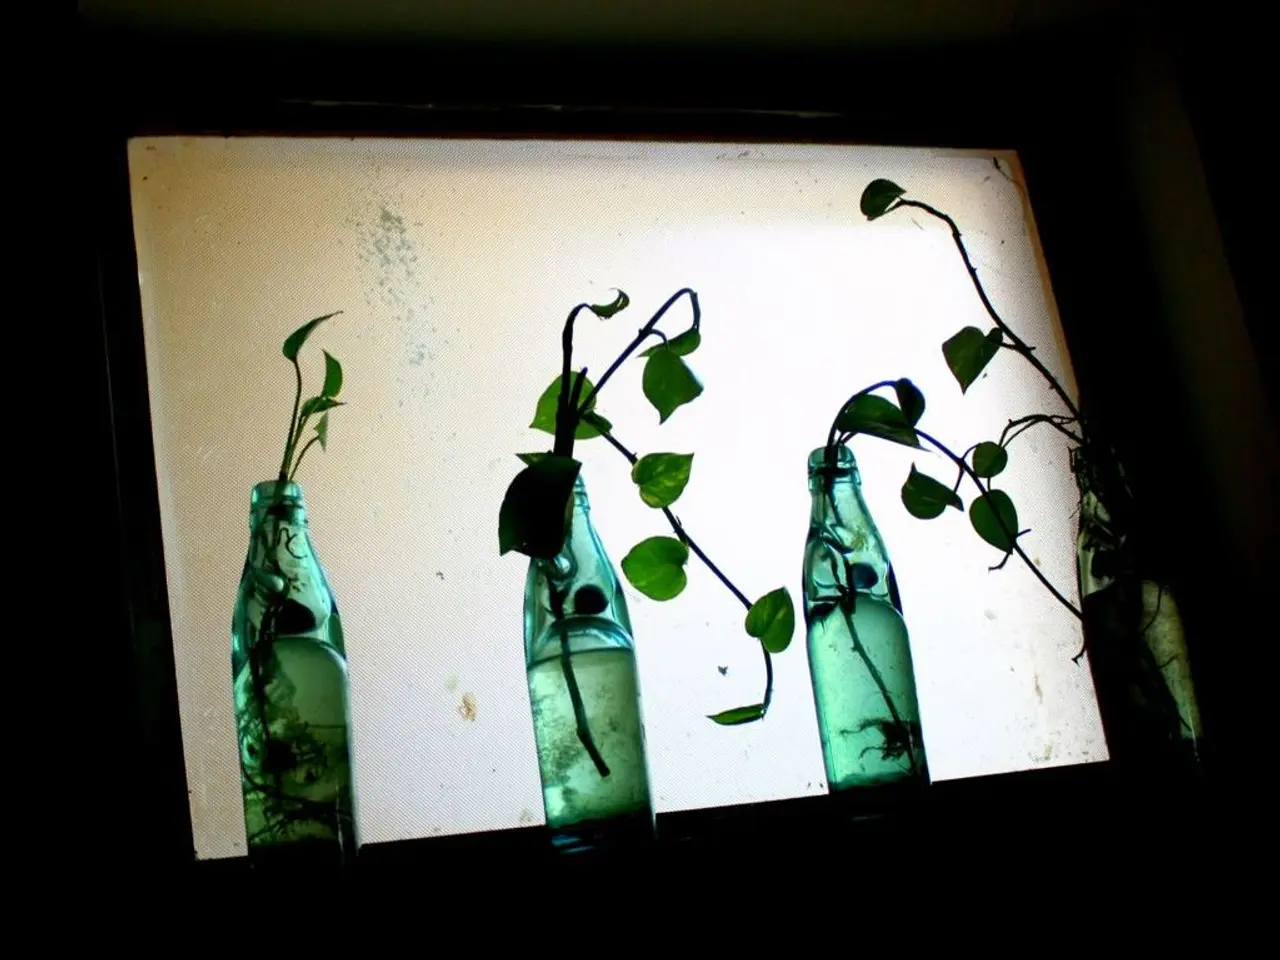
- Plenty of used 2-liter plastic bottles (or other large containers)
- An X-acto knife or sharp scissors
- Plastic wrap
- A strong rubber band
- Dirt from your backyard or potting soil
- Seeds that tickle your fancy (sunflowers, beans, peas, etc.)
- A spray bottle filled with water
- An optional plastic tray for catching drippings
TD;DR: Use plastic bottles, cut them, cover with plastic wrap, stick 'em together, plant seeds, and watch 'em grow!
Crafty Greenhouse Construction
Step 1 - Gather the essentials: Get your materials together, clean your bottles if needed, and dispose of any pesky labels.
Step 2 - Cut it up: Using your trusty X-acto knife or sharp scissors, cut off the center part of each plastic bottle just below the shoulder. Carefully create a few drainage holes in the bottom of each bottle.
Step 3 - Join the halves: Since you're no longer an ignorant child, please ask an adult to help you carefully connect the bottom and top parts of a bottle with the handle facing outwards, creating an open, greenhouse-like structure.
Pro-Tips:- Use smaller bottles to fit inside larger ones for miniature gardens!- Be sure to leave an opening big enough for easy planting and tending.
Time to Plant Your Seeds & Watch the Magic
Step 4 - Fill it up: Load the bottom halves of your plastic greenhouses with soil and pop a few seeds in there. Give 'em a little drink to settle them in.
Step 5 - Wrap it up: Cover the open top of each greenhouse with a piece of plastic wrap and affix it with a rubber band. Remember, this helps trap moisture and keep your plants watered.
Step 6 - Get them growin': Position your tiny greenhouses in a sunny window sill or balcony to catch the rays. If desired, place them on a tray to catch any drippings.
Step 7 - Observe diligently: Engage in some good ol' fashioned plant-watching! Keep an eye on your seeds as they sprout, grow, and transform into an explosion of green at your very own miniature greenhouse!
For an added bonus, encourage little garden enthusiasts to start a seed diary to document daily observations and draw pictures of their progress.
Now Go Green Your World!
By repurposing waste materials, teaching plant science, fostering a love for nature, and encouraging creativity, you'll inspire everyone in your classroom to make their own DIY plastic bottle greenhouses.
Pssst! Curious about how this humble greenhouse actually works? Wanna impress your friends with some awesome greenhouse science facts? Here's a little primer on how greenhouse effects work:
Greenhouses warm up the air inside through trapped solar radiation on their transparent surfaces. They retain heat by absorbing and re-emitting heat in the infrared part of the spectrum, which can't escape as easily—just like your plastic bottle friends!
Now go forth and greenify the 'verse!
- Make your classroom vibrant with a DIY plastic bottle greenhouse filled with lush, growing plants.
- A greenhouse is a structure enclosed mostly by glass, creating an ideal environment for plants to grow, much like a secret garden.
- The DIY project requires simple materials found at home or in the recycling bin, such as plastic bottles, X-acto knife, plastic wrap, rubber band, soil, seeds, a spray bottle, and an optional plastic tray.
- To construct the greenhouse, cut off the center part of each plastic bottle and create drainage holes, then connect the bottom and top parts to create an open, greenhouse-like structure.
- Fill the bottom halves of the plastic greenhouses with soil, plant seeds, and cover the open top with plastic wrap, secure with a rubber band.
- Place the greenhouses in a sunny location, and observe them as the seeds sprout, grow, and transform into an explosion of green.
- Encourage students to start a seed diary to document daily observations and drawings of their progress.
- This fun, hands-on project not only helps make the classroom more interesting but also teaches students about plant science and fosters a love for nature.
- By repurposing waste materials, students will learn about sustainability and creativity while also encouraging a more eco-friendly lifestyle.
- The greenhouse project aligns well with Kindergarten and Elementary science, STEM education, home-and-garden, gardening, and education-and-self-development themes.
- As students watch their greenhouses grow, they will be engaged in a learning activity that is both fun and educational, providing hours of entertainment and a sense of accomplishment.


